LED PSU Calculator

Configure your LEDs and find the perfect power supply

Start from a common project

Configure Your LEDs

Add your LED strips or matrices and specify their parameters. Not settled on a strip or a rail yet? The strip types guide compares the chips, the voltage guide the rails, and the chip reference carries the measured draw behind every preset here.

Fixture shape
5V

Industry standard - Most popular

m
LEDs/m
Power
18.0 W/m
Strip Power Draw24.2W
Power Required
5V
10W
Brightness the figure above assumes

Matching Power Supplies

10W5V
Where you shop

5V rail, 10W

Value
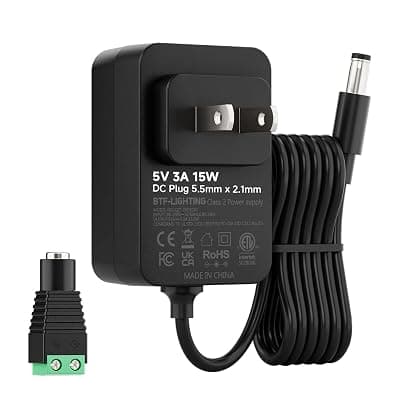
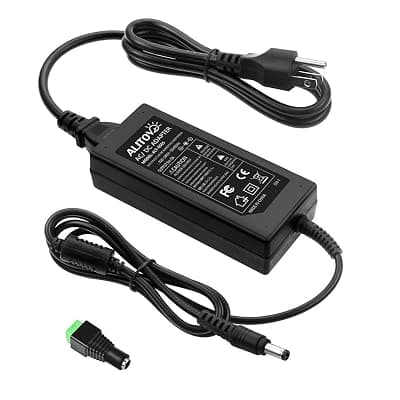
ALITOVE 5V 3A 15W power supply
ALITOVE 5V 3A 15W
15W5V
Ample capacity

The most reviewed 15W adapter in this class by a wide margin

Professional
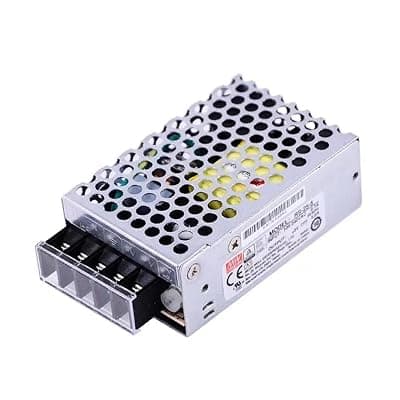
Mean Well RS-25-5 power supply
Mean Well RS-25-5
25W5V
High capacity

Enclosed 25W with the same terminals and case as the rest of the RS line

Value
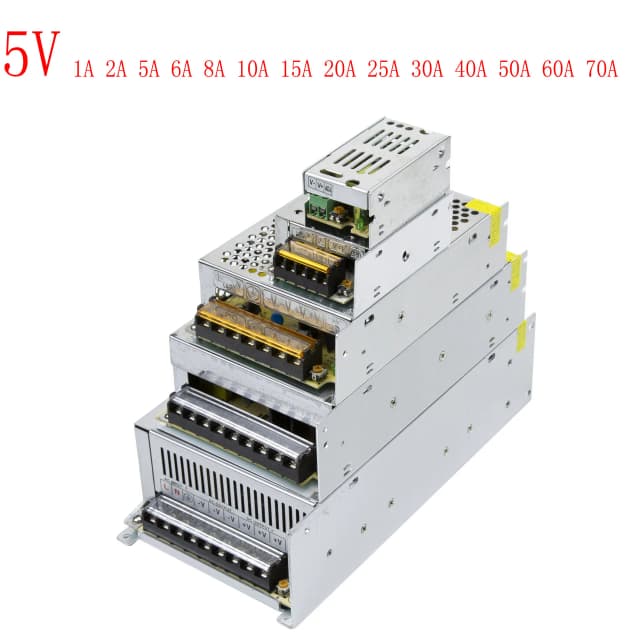
Switching Power Supply DC 5V 2A 5A 10A 20A 30A 40A 60A 70A Light Transformer AC 100-240V Source Adapter SMPS For LED Strips CCTV
5V enclosed SMPS 5V 25W
25W5V
High capacity

Bare enclosed supply with screw terminals, at a fifth of the Mean Well price

Pick 5A

Value
ALITOVE 5V 5A 25W power supply
ALITOVE 5V 5A 25W
25W5V
High capacity

Barrel-jack brick at the 25W step, no terminal wiring

The strip on this rail
WS2812BPer LED
WS2812B LED strip
WS2812B RGB (60 LEDs/m)
5V60 LEDs/m12.1 W/m

Pick your density, in IP30, IP65 or IP67, on black or white PCB

Your parts list

Cable and fuse sized for a 6ft feed.

Quick Reference Tables

These tables show typical power consumption for common LED strip types. Keep in mind that actual values vary by manufacturer, so always check your specific product's datasheet when available. What separates these families beyond the numbers — control, colours, where each one fits — is the strip types guide.

LED Strip Power Consumption by Type

LED TypeVoltagePower per MeterTypical Use
WS2812B RGB (30 LEDs/m)5V6.1W/mBudget option for accents
WS2812B RGB (60 LEDs/m)5V12.1W/mIndustry standard - Most popular
WS2812B RGB (144 LEDs/m)5V29.1W/mHigh density for detailed work
SK6812 RGB (30 LEDs/m)5V4.5W/mBudget alternative to WS2812B
SK6812 RGB (60 LEDs/m)5V8.9W/mAlternative to WS2812B
SK6812 RGB (144 LEDs/m)5V21.5W/mHigh density alternative
WS2813 RGB (30 LEDs/m)5V6.1W/mBackup data line, fault tolerant
WS2813 RGB (60 LEDs/m)5V12.1W/mBackup data line, reliable
SK9822/APA102 RGB (60 LEDs/m)5V16.7W/mClock+Data, fast refresh, POV
SK9822/APA102 RGB (144 LEDs/m)5V40.2W/mHigh density clock+data
WS2812B-mini 2020 (60 LEDs/m)5V12W/mCompact 2x2mm package
SK6812 RGBW (30 LEDs/m)5V7.2W/mWhite channel for accents
SK6812 RGBW (60 LEDs/m)5V14.3W/mPopular for indoor lighting
SK6812 RGBW (144 LEDs/m)5V34.4W/mHigh density with white
SK6812 WWA (60 LEDs/m)5V12.8W/mWarm white, cool white and amber - no colour
WS2815 RGB (30 LEDs/m)12V4.7W/m12V dual-signal, longer runs
WS2815 RGB (60 LEDs/m)12V9.4W/m12V dual-signal, most popular
WS2815 RGB (144 LEDs/m)12V22.6W/m12V high density
WS2811 RGB (30 LEDs/m)12V7.3W/m3-LED segments, outdoor use
WS2811 RGB (60 LEDs/m)12V14.7W/m3-LED segments, general use
GS8208 RGB (30 LEDs/m)12V4.4W/m12-bit gamma, dual data signal
GS8208 RGB (60 LEDs/m)12V8.8W/m12-bit gamma, holiday pixels
TM1814 RGBW (60 LEDs/m, 12V)12V22.1W/m12V RGBW, 3-LED segments
TM1814 RGBW (60 LEDs/m, 24V)24V22.1W/m24V RGBW, 6-LED segments and twice the reach
WS2814 RGBW (60 LEDs/m, 12V)12V16.2W/m12V RGBW, 3-LED segments
WS2814 RGBW (60 LEDs/m, 24V)24V16.2W/m24V RGBW, twice the reach per feed
WS2812B FCOB (180 LEDs/m)5V11W/m5V 1 IC per LED, fully addressable
WS2811 FCOB 12V (576 LEDs/m)12V8W/m12V dot-free, segment addressable
WS2811 FCOB 24V (576 LEDs/m)24V16W/m24V dot-free, longer runs
WS2811 FCOB 24V (630 LEDs/m)24V19W/m24V high density, seamless light
WS2811 FCOB 24V (720 LEDs/m)24V21W/m24V highest density, most popular
WS2814 FCOB RGBW (784 LEDs/m)24V21W/m24V RGBW with white channel
SMD 2835 White (60 LEDs/m, 12V)12V4.8W/mBudget single-color, under-cabinet lighting
SMD 2835 White (120 LEDs/m, 12V)12V9.6W/mHigh density single-color, even light output
SMD 2835 White (120 LEDs/m, 24V)24V9.6W/m24V for longer runs, less voltage drop
SMD 5050 White (30 LEDs/m, 12V)12V7.2W/mLarger chips, good brightness per LED
SMD 5050 White (60 LEDs/m, 12V)12V14.4W/mBright single-color, accent and task lighting
SMD 5050 White (60 LEDs/m, 24V)24V14.4W/m24V bright single-color, longer runs
COB White (320 LEDs/m, 24V)24V8W/mDot-free continuous light, shelves and coves
COB White (528 LEDs/m, 24V)24V14W/mHigh density dot-free, premium look
COB White (450 LEDs/m, 48V)48V9.8W/m48V for very long runs, fewest injection points
SMD 5050 RGB (30 LEDs/m, 12V)12V7.2W/mBasic RGB color mixing, accent lighting
SMD 5050 RGB (60 LEDs/m, 12V)12V14.4W/mDense RGB, vivid color mixing
SMD 5050 RGB (60 LEDs/m, 24V)24V14.4W/m24V RGB, longer runs with less voltage drop

Power Supply Derating Guidelines

Heat is the enemy of power supplies. The hotter your environment, the less load your PSU can safely handle, and the shorter it will last. If your setup runs in a warm enclosure or during summer months, plan accordingly.

Operating TempMax Load %Expected Lifespan
25°C (77°F)100%50,000 hours
40°C (104°F)90%40,000 hours
50°C (122°F)80%30,000 hours
60°C (140°F)70%20,000 hours
70°C (158°F)60%10,000 hours

How to Calculate LED Power Supply Requirements

Here's how the calculator figures out what PSU you need. It's a straightforward process once you know the steps.

  1. 1

    Identify LED strip specifications

    Find the power consumption specification from your LED strip manufacturer's datasheet. This is typically listed as watts per meter (W/m) for COB/FCOB strips, or watts per LED for addressable LEDs like WS2812B.

    Datasheets quote the theoretical ceiling - three channels at 20 mA is 0.3W for a 5V chip - and no strip on a bench reaches it. The figures here are measured instead, which is why they sit below the number on the reel.

    Example:

    WS2812B draws 0.202W per LED measured at full white (12.1W/m at 60 LEDs/m), WS2811 FCOB 24V draws 21 W/m
  2. 2

    Measure total run length

    Measure the total length of LED strips you plan to install, accounting for all segments. For matrix configurations, multiply width by height to get total LED count. If running multiple parallel strips, add their lengths together.

    Example:

    Three 2-meter strips = 6 meters total, or 16×16 matrix = 256 LEDs
  3. 3

    Calculate base wattage

    Multiply power consumption per unit by total length or LED count.

    For continuous LEDs: Base Wattage = (Power per meter) × (Length in meters)

    For addressable LEDs: Base Wattage = (Watts per LED) × (Number of LEDs)

    Example:

    14.4 W/m × 5m = 72W, or 0.202W × 300 LEDs = 60.6W
  4. 4

    Apply 20% safety factor

    Multiply base wattage by 1.2 to add a 20% safety margin. This prevents the PSU from running at maximum capacity, which causes overheating, reduces lifespan, and doesn't account for voltage drop over distance.

    Formula: Required Wattage = Base Wattage × 1.2

    Example:

    72W × 1.2 = 86.4W required
  5. 5

    Select commercial PSU rating

    Choose the next available commercial power supply rating above your calculated requirement. Power supplies come in standard sizes: 30W, 60W, 100W, 150W, 200W, 300W, etc.

    Important: Verify the voltage matches your LEDs (5V, 12V, 24V, or 48V).

    Example:

    For 86.4W calculated → select a 100W power supply

Complete Worked Example

Let's calculate the power supply requirements for a 5-meter WS2812B RGB LED strip (60 LEDs/m) at 5V:

Step 1: LED Specification

WS2812B at 60 LEDs/m × 0.202W = 12.1 W/m

Step 2: Total Length

Total strip length = 5 meters (300 LEDs)

Step 3: Base Wattage

12.1 W/m × 5m = 60.5W

Step 4: Apply Safety Factor

60.5W × 1.2 = 72.6W

Step 5: Select PSU

Next standard size above 72.6W = 100W power supply

✓ Final Answer: Use a 5V 100W (20A) power supply

Understanding the Power Calculation Formula

The math behind LED power calculations is actually pretty simple. Here's what each part means and why it's there.

Required PSU Wattage = (Power per meter) × (Length in meters) × (Safety Factor)

Power per meter

This varies by LED type, and by more than people expect. Addressable LEDs like WS2812B use watts per LED - measured at 0.202W at full white, against the 0.3W the datasheet allows for - while an SK6812 draws 0.149W and an APA102 0.279W for the same job. Continuous strips like SMD 5050 use watts per meter (typically 14.4W/m for 12V). Always check your own strip: the spread between chips is close to two to one.

Length in meters

Total length of all LED strips in your installation. If running multiple strips in parallel from the same PSU, add up their individual lengths. For matrices, multiply width × height to get total LED count, then use watts per LED instead of watts per meter.

Safety Factor (1.2 = 20%)

Adding 20% prevents the PSU from running at 100% capacity continuously. Benefits: prevents thermal stress and overheating, extends PSU lifespan significantly (heat is the #1 killer of electronics), accounts for voltage drop over wire distance, provides headroom for future expansion, ensures stable voltage under full load. Never operate a PSU at its maximum rated capacity 24/7.

💡 Why This Formula Works

Power (Watts) is the product of voltage and current: P = V × I. When you know how much power your LEDs consume per meter and how many meters you have, you can calculate total power draw.

The 20% safety factor is critical because:

  • Power supplies degrade over time - capacity decreases with age
  • Running at 100% capacity generates excessive heat, reducing lifespan dramatically
  • Wire resistance causes voltage drop, especially over distance
  • Future-proofing: you might add more LEDs or run them brighter later
  • Manufacturing tolerances mean your PSU might not deliver exactly its rated capacity

Professional installations often use 30-40% safety margins for mission-critical applications. The 20% minimum recommended here balances cost and reliability for hobby and semi-professional use.

Formula Variants for Different LED Types

Addressable LEDs (WS2812B, SK6812)

Watts = (LED Count × Watts per LED) × 1.2

Example: 300 LEDs × 0.202W × 1.2 = 73W

Continuous LEDs (COB, FCOB, SMD)

Watts = (Meters × Watts per meter) × 1.2

Example: 8m × 14.4W/m × 1.2 = 138W

Matrix Configuration

Watts = (Width × Height × Watts per LED) × 1.2

Example: 16×16 × 0.202W × 1.2 = 62W

Multiple Strips (Parallel)

Watts = (Total Length × Watts per meter) × 1.2

Example: (3m + 2m + 4m) × 18W/m × 1.2 = 194W

Questions

Quick answers to common LED power supply questions. Click any question to reveal the answer.

LEDs appear dim at the end due to voltage drop - the electrical resistance of the copper traces causes voltage to decrease over distance. One feed reaches about 2.5 meters at 5V; past that the far end runs visibly under voltage.

Solutions:

  • Inject power at multiple points along the strip (beginning, middle, and end for long runs)
  • Use thicker wire gauge (lower AWG number like 16 or 18 AWG)
  • Switch to higher voltage LEDs (12V or 24V) which are less affected by voltage drop
  • Keep individual strip runs under the recommended maximum length for your voltage

An undersized power supply will cause multiple problems:

Immediate symptoms:

  • LEDs appear dim or colors are incorrect (especially white appears yellow/orange)
  • Flickering or intermittent operation
  • Animations run slower than expected
  • Some LEDs don't light up at all

Long-term damage:

  • Power supply runs excessively hot and fails prematurely
  • Thermal shutdown protection activates, cutting power completely
  • Voltage sag damages LED driver circuits
  • Fire hazard in extreme cases

Always size your PSU at least 20% above your calculated maximum draw

to prevent these issues and ensure safe, reliable operation.

A moderately oversized power supply (up to 2-3x your requirement) costs nothing but money.

What the headroom buys:

  • Longer PSU lifespan due to cooler operation (less thermal stress)
  • Room for future expansion without replacing PSU
  • Better efficiency at typical load levels (most PSUs are most efficient at 50-80% load)
  • Reduced electrical noise and ripple
  • More stable voltage under varying loads

When oversizing becomes wasteful:

  • Only excessive oversizing (5x+ your needs) wastes money on upfront cost
  • Very low loads (<10% of PSU capacity) may reduce efficiency slightly
  • Larger physical size may not fit in your enclosure

The comfortable case:

a 100W PSU powering a 60W LED installation - plenty of headroom without waste.

Connect multiple strips in parallel, never daisy-chain for power:

Correct wiring method:

  • Run separate positive (+) and negative (-) wires from the PSU to each strip's input
  • Use a terminal block or distribution board to split PSU output to multiple strips
  • Never run power through one strip to feed another (daisy-chaining causes voltage drop)

Wire gauge considerations:

  • Calculate total current: sum of all strips
  • Use appropriate wire gauge based on total current and longest distance
  • Thicker wire for longer runs to minimize voltage drop

PSU sizing:

  • Total PSU wattage must cover the sum of ALL strips plus 20% safety margin
  • Example: Three 20W strips = 60W + 20% = 72W minimum PSU

For addressable LEDs:

  • Power in parallel (separate wires to each strip)
  • Data in series (DOUT of strip 1 connects to DIN of strip 2)

Inject power when you notice voltage drop symptoms or exceed what one feed covers:

Inject power when:

  • 5V strips exceed 2.5 meters - inject every 2.5m
  • 12V strips exceed 5 meters - inject every 5m
  • 24V strips exceed 10 meters - inject every 10m
  • Denser strips pull these distances in - the calculator accounts for it
  • You see visible dimming or color shift at the far end

How to inject power:

  • Connect additional power wires (+/-) to the strip's power pads at each point
  • Run these wires back to your PSU (or use a second PSU)
  • Use the same wire gauge as your main power connection
  • Only connect power (+/-), NOT data signal

Very long runs:

feed both ends as well as the points between them - the calculator marks every position for your own strip and length.

Yes, you should use a fuse for any installation over 60W.

Fuses protect against short circuits, wiring faults, and prevent fires.

Fuse sizing rule:

Choose a fuse rated at 125-150% of your expected maximum current.

Examples:

  • 60W @ 5V (12A) → 15A fuse
  • 100W @ 5V (20A) → 25A fuse
  • 150W @ 12V (12.5A) → 15A fuse
  • 300W @ 12V (25A) → 30A fuse

Fuse types for LED projects:

  • Automotive blade fuses: Cheap, easy to find, good for DC
  • Inline fuse holders: Mount on your positive wire between PSU and LEDs
  • Resettable fuses (polyfuses): Auto-reset after cooling

Important notes:

  • Fuse goes on the positive wire only
  • Place fuse as close to PSU as practical
  • A blown fuse indicates a problem to diagnose

The right voltage depends on your strip length, project type, and controller setup.

5V strips (WS2812B, SK6812):

  • Individual LED control — best color effects and animations
  • Voltage drop limits one feed to about 2.5 meters without power injection
  • Higher current draw means thicker wires needed
  • Ideal for: short accent strips, TV backlights, small matrices, desk lighting

12V strips (WS2815, WS2811, GS8208):

  • Good balance between addressability and run length
  • 3-LED segments reduce power wiring complexity
  • One feed covers about 5 meters before injection is needed
  • Ideal for: medium runs, staircases, under-cabinet, holiday displays

24V strips (COB, FCOB):

  • Lowest current for the same wattage — thinnest wires, least voltage drop
  • One feed covers about 10 meters
  • Mostly COB/FCOB for continuous, dot-free light
  • Ideal for: long runs, room perimeters, cove lighting, architectural

Rule of thumb:

Choose the highest voltage your controller and LED type support. Longer runs = higher voltage.

USB can work for very small projects, but has strict limitations.

USB power limits:

  • USB 2.0: 2.5W (5V @ 500mA) — only a few LEDs
  • USB 3.0: 4.5W (5V @ 900mA) — about 15-20 WS2812B LEDs at full white
  • USB phone charger (5V/2A): 10W — about 30-50 LEDs at animation brightness
  • USB-C PD: up to 100W — viable for larger projects but needs a PD trigger board

When USB works:

  • Small accent strips under 30 LEDs
  • Low-brightness ambient effects (not full white)
  • Portable or temporary installations
  • Prototyping and testing

When you need a dedicated PSU:

  • More than 50 LEDs or over 10W total
  • Full-brightness white or sustained high output
  • Permanent installations that need reliability
  • Any 12V or 24V LED strips

Important:

Cheap USB chargers may not deliver their rated current reliably. For anything beyond a quick prototype, use a proper Mean Well or similar rated power supply.

WLED's brightness limiter is one of the most important settings to configure. It caps total power draw so your PSU never gets overloaded.

How to set it:

  • Open WLED web interface → Config → LED Preferences
  • Find Maximum Current (in milliamps)
  • Set it to your PSU's rated output minus 20% headroom

Example calculations:

  • 5V 10A PSU (50W): set to 8000 mA (80% of 10,000)
  • 5V 20A PSU (100W): set to 16000 mA
  • 12V 5A PSU (60W): set to 4000 mA

Why this matters:

  • WLED dims all LEDs proportionally when the limit would be exceeded
  • Prevents PSU overload, flickering, and brownouts
  • The dimming is proportional across channels, so the effect keeps its color balance
  • This is why our calculator's "Effects" mode is realistic: in practice, WLED rarely lets strips draw full power

Pro tip:

If your LEDs seem dimmer than expected, check this setting first. It may be set too low from a previous configuration.

Yes, using multiple PSUs is common and sometimes necessary for large installations.

When to use multiple PSUs:

  • Total power exceeds 300W (single PSUs get expensive and bulky above this)
  • LEDs are spread across different physical locations
  • You want redundancy in critical installations
  • Different voltage zones (e.g., 5V for short accents + 24V for long runs)

How to wire multiple PSUs safely:

  • Connect the negative/ground of all PSUs together — this is essential for data signals to work between segments
  • Each PSU powers its own section of LEDs on the positive wire
  • Never connect the positive outputs of two PSUs together
  • Data signal runs continuously across all segments

Wiring diagram concept:

  • PSU 1 (+) → LED segment 1 (+)
  • PSU 2 (+) → LED segment 2 (+)
  • PSU 1 (-) + PSU 2 (-) → common ground bus → all LED segments (-)
  • Data: Controller → DIN segment 1 → DOUT → DIN segment 2

Important safety notes:

  • All PSUs must output the same voltage for connected LED segments
  • Fuse each PSU's positive output independently
  • Use a ground bus bar or terminal block for clean common grounding

Multiply the per-LED figure by the LED count, or read the watts per meter off the strip table above.

The two ways strip is rated:

  • Addressable strip is rated per LED. A WS2812B draws 0.202W at full white, so a 60/m reel is 12.1 W/m and a 5 meter reel of it is 60.6W
  • Continuous strip (SMD 5050, COB) is rated per meter directly, typically 14.4 W/m at 12V

The rated wattage is a ceiling, not a load.

Every figure above is full white on every LED at once, which is the one thing an effect never does. The calculator's Effects mode puts that same reel at 21.1W, and that is the number your PSU actually sees.

Watch the density.

Wattage per meter scales with LEDs per meter, so the same chip at 144/m is 29.1 W/m against 12.1 W/m at 60/m. Density also pulls in how far one feed reaches - 1.75m instead of 2.125m at 5V - so a denser strip is both more watts and more injection points.

To size from wattage:

total watts, add 20% headroom, then pick a supply at or above that. The calculator does this from your own strip and length.

Amps are watts divided by volts, which is why the rail matters more than the wattage when you are choosing wire and fuses.

The same 60.6W of strip, on three rails:

  • 5V: 12.1A
  • 12V: 5A
  • 24V: 2.5A

Same light, same power, and roughly a fifth of the current at 24V. Current is what heats wire, drops voltage along the strip and sizes the fuse, so the higher rail is thinner cable and fewer feeds for identical output.

What amp draw decides:

  • Wire gauge - the wire calculator picks the AWG from the current and the run length
  • Fuse rating - 125-150% of expected maximum current
  • PSU rating - supplies are sold in amps at a voltage, so a 5V 10A unit is 50W
  • WLED's current limit - set in milliamps, so 12.1A is 12100 mA

Measure at the feed, not the far end.

Amperage is highest where power enters the strip, and that first segment is the one carrying current for everything downstream of it.

For addressable strip, a constant-voltage power supply - which is what this calculator sizes.

The distinction matters because the parts are not interchangeable:

  • Constant voltage (what you want): holds 5V, 12V or 24V and lets the strip draw the current it needs. Sold as an LED power supply, LED driver, or just a 12V supply
  • Constant current: holds a fixed current in milliamps and varies its voltage. Used for COB modules, high-power emitters and downlights. Wiring one to addressable strip does not work

"LED driver" is used for both

, which is where the confusion starts. Read the output: a spec in volts and amps (12V 5A) is constant voltage; a spec in milliamps with a voltage range (700mA, 25-40V) is constant current. Only the first will run a strip.

"Transformer" is the analog-lighting word

and is not really accurate here - a transformer changes AC voltage, while everything in an LED strip build runs on DC from a switch-mode supply. If a product calls itself an LED transformer, check the output is DC at the voltage your strip wants.

Dimmable is a separate question.

A dimmable driver dims the whole output, which is not how addressable strip works - a WS2812B dims itself, per LED, in the controller.

About

Figuring out which power supply you need for an LED strip project involves a bunch of calculations. This tool does that math for you and shows matching products.

The recommendations default to Mean Well because they have proper certifications, low failure rates, and cost about the same as generic alternatives.

20+LED presets
43PSUs
5–48VRange